Contents
- 1 How to fix a leaking Faucet
- 1.1 Why Your Faucet Leaks or Drips
- 1.2 How to Shut Off the Water to the Faucet
- 1.3 What You Will Need
- 1.4 Instructions
- 1.5
- 1.6 When to Replace Your Leaky Faucet Instead of Fixing It
- 1.7 Plumber Blogs-your go-to site for “plumber near me” and emergency plumbers
- 1.8 Author
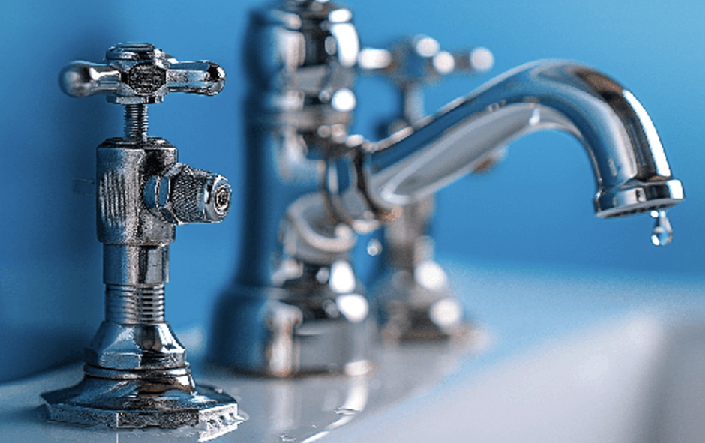
How to fix a leaking Faucet
If you have ever faced a situation with a leaking faucet, you will relate to how frustrating it is. Not only is the sound annoying, but the regret of wasting water is also through the roof. If a faucet leaks every second, it can leak as much water as needed for 180 showers! The feeling of regret further increased after hearing this fact, right? Same here. Fortunately, fixing a leaking faucet is pretty straightforward, but sometimes you need help. That’s where Plumber Blogs comes in.
Whether you are looking for an emergency plumber or are thinking about a “Plumber near me”, Plumber Blogs has your back. Our website makes your life easier by giving you a complete guide on how you can locate plumbers near you. We provide a comprehensive list of emergency plumbers in the USA. Our website lists DIY tips and gives a comprehensive guide to plumbers across Europe and the USA.
This blog effectively covers the reason for your faucet dripping, explains how you can fix it, and talks about how to find a plumber near you. Let’s get right to it.
The good news is that you can fix leaky faucets yourself, and there is no need to call a plumber to do the job for you. However, it’s better to call a plumber if you don’t have the required tools and the steps given in the blog don’t work. Our website is here to assist you if you are looking for an Emergency Plumber. Let’s shed light on why faucets drip in the first place.
Why Your Faucet Leaks or Drips
There are compression valves or sink cartridges in faucets responsible for controlling water flow. Due to frequent usage, these can get worned out. Hence, most faucet leaks are caused by worn-out stem assembly or worn out cartridges. You can replace these and your faucet should be restored to normal functioning.
Worn Sink Cartridge
Sink cartridges are hidden under the faucet in most double and single handle faucets. These are responsible for controlling the water flow. Sink cartridges are made of metal and plastic. These cannot be repaired and are self-contained. You can, however, replace them after removing them on a one-for-one basis.
Every model and brand of faucet has a unique sink cartridge. As a result, before you purchase one for replacement, it’s essential to know the cartridges type your faucet needs.
Here’s a video to help you identify your brand and model number. If you’re still confused, you can look up “Plumbers near me” on our website- Plumber Blogs. Our website provides a comprehensive list of emergency plumbers for you.
Worn Compression Faucet Washer
Compression valve faucet is another style of faucet. As the name suggests, these compress a stem washer in the assembly. This happens when the faucet handle is turned and shuts off the water supply. Compression valves are primarily common in older homes.
The faucet is frequently used, so the silicone washer or soft rubber can wear down. If you think of tightening the faucet to fix the leaking, it won’t work 🙁
To fix this type of leak, replace the faucet stem washer. This usually fixes the problem. Most leaks in compression faucets can be fixed by this method, which is relatively inexpensive and straightforward.
How to Shut Off the Water to the Faucet
Before you fix your leaking faucet, shutting off the water supply is essential. To do that, close the water supply to the faucet, which is located directly below the sink. You’ll have to find the two shut-off valves to cut off the power supply. After opening the cabinet door, you will find shut-off valves and two braided water supply lines. Turn the lever or knob in a clockwise direction for each line individually till it’s tight.
Check if the water supply has been shut down. Ensure that the main water shut off valve is turned off. Often located on a house’s inside perimeter side facing the street, this will shut down the water supply to the entire house.
What You Will Need
Equipment / Tools
- Utility knife
- Phillips-head screwdriver
- Flathead screwdriver
- Set of Allen keys
- Channel-lock pliers
- Adjustable wrench
Materials
- Kit of assorted stem washers and screws
- Silicone faucet grease
- Replacement faucet cartridge (if needed)
Instructions

Fixing a Cartridg Faucet
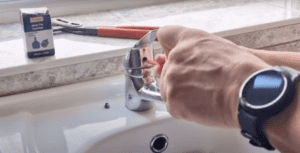
1. Remove the Screw From the Handle
Remove the Faucet handle after you have shut off the water and plugged the sink drain. Mostly, you’ll find a Hex or Allen present on the handle’s back or inside. In the screw, turn the Allen key anti-clockwise after inserting it. This will remove the screw. Place it somewhere safe after removing it so you don’t lose it.

2. Remove Faucet Handle
This step is easy. Just remove the handle by lifting it straight up.

3. Loosen Retaining Nut
A thin retaining nut is responsible for holding the sink cartridge in its place. Locate this nut. Once located, clamp adjustable pliers around it. Lose the nut by turning anti-clockwise. Use your hand to turn the rest of the nut out.

4. Remove Sink Cartridge
Pull the sink cartridge by holding it from the top. Sometimes, the cartridge may need a little wiggling so it loosens.

5. Apply Silicone Grease
Apply silicone faucet grease to replacement faucet cartridge’s body. You can apply this by using your finger.
6. Insert Replacement Cartridge
Align the faucet’s slot with the replacement cartridge tabs. Next, slide the cartridge so that it sits completely. Apply the retaining nut using the wrench.

7. Install the Handle
By using the Allen screw and key, install the faucet handle you removed in the beginning.
8. Test Water Flow
Let the faucet run for a minute or more after turning on the water supply valves. Turn it off later and check if there are any leaks.
Fixing a Compression Faucet
1- Remove the Handle
Shut the water supply just like for the cartridge faucet. Use a Phillips-head screwdriver or an Allen key to remove the faucet handle. Often, faucets have a cap over them for decoration purposes. Use a flat-headed screwdriver to remove the cap. If you don’t have one, the knife’s edge will also work. Set the screw aside after unscrewing the handle.

2- Remove the Valve Cover (if Present) and Valve Stem Assembly
Unscrew the knob with pliers to remove the cover of the valve stem assembly.
After this, grip the valve stem assembly’s hex head by using pliers. Screwing this anti-clockwise will remove it.
3- Remove the Washer Screw
Remove the screw which holds the stem washer in place. Make use of a Phillips-head-screwdriver.

4- Remove Stem Washer
Use a utility knife or a fingernail to remove the stem washer out of the stem assembly.

5- Replace Stem Washer
Place the new stem washer firmly on the stem washer. On the top, the washer screw should be screwed.

6- Assemble Faucet

Attach the handle after replacing the valve cover (if applicable). If you have removed any decorative cap before, add the cap to the top.
Let the faucet run for a minute or more after turning on the water supply valves. Turn it off later and check if there are any leaks.
When to Replace Your Leaky Faucet Instead of Fixing It
The faucet Is 10 to 20 Years Old.
If your faucet has been used for more than 10 to 20 years, it may have other issues. The faucet will work for a while, and another of its sections will malfunction, just like an old car. Hence, buying a new faucet’s more effective and cheaper than repairing the old one.
Repairs Take Too Long
If your faucet leaks, fixing it on your own should take less than an hour. If it’s taking you more than that and the problem is still not fixed, it’s time you replace it.
Repairs Cost Too Much
Compare the cost of repairing your faucet with the cost of replacing it. If you own an inexpensive faucet, it may be better to replace it than repairing. However, it’s better to replace expensive faucets.
Since cartridges are the most expensive part, these are the determining factors. Most cartridges fall in the $10 to $50 range, whereas the expensive ones fall between $50 to $100.
Repairs Aren’t Working
Since faucets are used on a daily basis and are mechanical devices, wear and tear is inevitable. If you have tried all the above steps and still cannot fix your faucet, you should consider replacing it.
Plumber Blogs-your go-to site for “plumber near me” and emergency plumbers
While saving on the costs and fixing the faucet on your own is recommended, leaving it to the professionals is always a better choice. Especially if you are someone who does not have the tools to repair and is inexperienced, it’s better to rely on a professional. Now you must be thinking, how do I find a Plumber near me? Well, that’s why we’re here. Our website, Plumber Blogs, gives a comprehensive list of Plumbers in the USA and Europe.
We’ve outlined a step-by-step process that can help you find a plumber near you within minutes. Plumber Blogs also has a dedicated section for “Emergency Plumbers near me USA” You can check that out if you need an emergency plumber. Visit our website right away for any plumbing-related DIY tips, step by step guide to finding a plumber and any other plumbing related query.


